Product Categories
- Sue Michael (Unlicensed)
- Diane Partridge
- Monica Chand (Deactivated)
Overview
Product Category is one area within Readysell whereby you can assign a different general ledger account if you wish to use department breakup eg Sales Revenue Admin, Sales Revenue Stationary etc.
You would firstly create the general ledger chart of account for each department and then assign these accounts to the appropriate product category levels.
You may also want to break up the cost of goods area by the same department.
Note : Readysell does not recommend a department general ledger chart of accounts as you can run reports by Product Category within Readysell.
General Ledger Account breakups within the product category:
The accounting effect of when a stock item is sold, the cost of the product is removed from Stock on Hand and put to Cost of Goods.
Therefore this means the two accounts should be different if the product is being tracked for stock purposes as opposed to non-stock purposes.
Cost of Goods Sold: should be a profit & loss account
Sold Stock: should be a stock on hand account
Purchased Stock should be the same as Sold Stock for stock controlled products, to avoid a discrepancy between recording the purchase (increase in stock) and recording the sale (decrease in stock) unless the product is a non-stock product and a type of service or expense. EG Freight Inwards, the purchase general ledger account would be the general ledger account for Freight Inwards.
The accounting effect of when a stock item is received, the cost of the product is removed from Accrued Stock (Credit) on hand and put to the Stock on Hand (debit).
When the purchase receipt is then Invoiced, the accrued stock on hand figure is negated (debit) resulting in a nil effect.
For a non-stock product, (expense or service type eg freight inwards), the accrued stock and stock on hand is using the same general ledger account and this is because normally there is no cost on a non-stock product.
Procedure in respect to creating sub-department chart of accounts
Highlight the main general ledger account eg Sales Revenue 61010
Click on COPY
Change the Account-id to be 61012 and description to be Sales Revenue Header
Click On Save
Go Back to 61010 and rename it to eg 61010FUR and change the description to be Sales Revenue - Furniture.
Ensure that 61010FUR on the settings tab, that the P&L Parent and Bal Sheet Parent account are both changed to point to 61012
Click on SAVE
Go back to general ledger account 61012 and change that to be 61010 and Click on Save
Check that 61010FUR on the settings tab, that the P&L Parent and Bal Sheet Parent account are both now 61010
Repeat steps by highlight the sub-department gl account 61010FUR and name it eg 61010ADMIN with a description of Sales Revenue - Administration etc
Continue until you have created the appropriate sub-departments in the areas of the chart required.
The task may need to be run to refresh general ledger balances and/or re-dissect if you have created new gl accounts and assigned them to categories
Speak to Readysell
Every category must have a category type of:
- Stock control products, which means every product in that category is a product you can stock
- Non-stock control products, which means every product in that category is a non-stock item, a service, like freight, service fee etc.
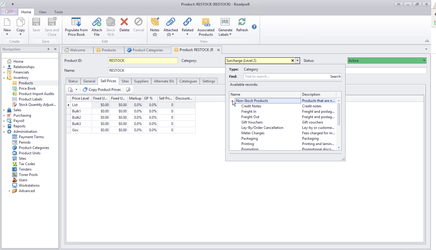
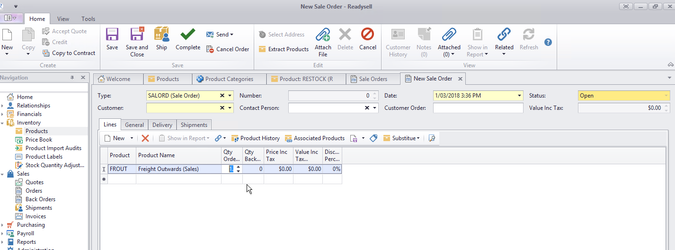
To create a non-stock product, like freight, create the product then when entering a category on the product, select a non-stock category. The simplest way to do this is to copy an existing non-stock product then change the details. Something like "RESTOCK" should exist on your system and can be copied to a new non-stock product.
To create a stocked product, make sure the category you select for the product has a category type of "stock control products"
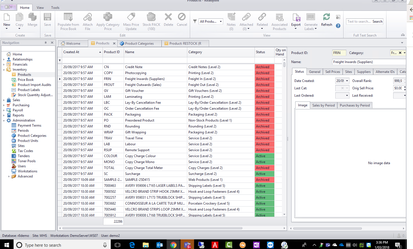
The non-stock products that come with the system include freight in freight out and many other common non-stock items. Just add the non-stock product you want to a sale and enter a quantity and price to add a non-stock fee to a sale.
Procedure once the General Ledger Accounts are set up:
The first step is to set up the Product Categories.
The second step for Non-Stock Products is to determine the Costing method. This affects GP% and Margin on Sales Invoicing
The third step is to put products into the correct product categories.
The fourth step is to ensure that the correct General Ledger account codes are correct on each Parent category. If you wish to break up the general ledger further you can assign a different General Ledger account to the child. It works like Parent/Child scenario.
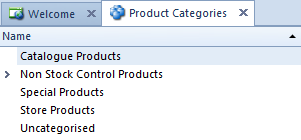
There are a few base categories
- Catalogue Products
- Store Products
- Uncategorised Product
- Non-Stock Product
Products that are added to your site and are not part of the standard product range for the group should be in the Store Products categories.
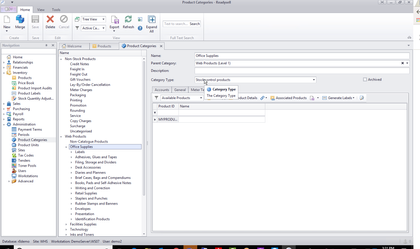
On the Navigation panel click on 'Administration' and then click on 'Product Categories'
Maintaining Categories
- Catalogue Products appear in Parent /Child tree structure
- Each category can have any number of subcategories
- Each subcategory can have its own general ledger accounts assigned to it.
- Each category can have it own costing method.
Those subcategories that don't have there own General Ledger accounts will use the gl accounts off the parent category of that sub-category
No longer used Product Category can be archived.

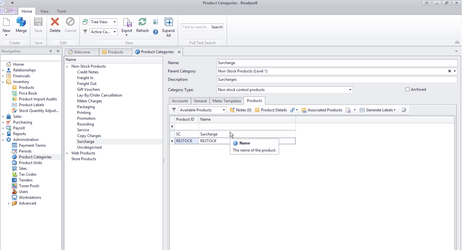
Non-Stock Product Categories
If a product is not Purchased and not Sold and is any form of a 'Service' then you would assign that product to the correct Non-Stock Product Category.
You can break up your non-stock product categories depending upon the service provided eg Freight Inwards, Restocking Fee, Laminating, Meter charge service, Leasing Fees etc.
You can also set up a separate General Ledger Account if need be and assign to the non-stock product category child.
Readysell has a set of default non-stock product categories already set up. You can add more/maintain these non-stock product categories which will, in turn, give you a breakdown by product category on your Sales Analysis Reports.
Managing product costs for non-stock product categories
Product categories can be used to assign a cost when you SELL non-stock products. The methods apply to all products in the non-stock category.
If there is NO cost on the non-stock product, then set the cost method on the Product category to be a type = NONE.
If there is a cost on the product and the 'Non-Stock Costing Method' is set to anything else other than NONE, then the cost method on the category will apply.
Notional costing for eg on labour products
Costing methods on non-stock products can be set up to have a notional/estimated costing.
Here you would set up the Costp1 on the primary supplier for the product within the non-stock product category.
Then apply the costing method on that category as being Product Supplier Cost eg for products such as Labour.
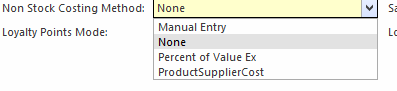
The methods available are:
- None - sell at zero cost
- Manual entry - at the time you insert either a sales order, service order, sale shipment or service shipment, if the product is in the non stock product category set up to have a costing method of 'manual entry' at the time you click on Save, the system will prompt and requires the user to enter a manual cost.
You need to ensure that the products that you wish to apply a manual cost entry to are in the right non stock product category that has the Non-Stock Costing Method set to Manual Entry. - Percent Of Value Ex - When inserting a sales order, if the product is in the non stock product category where the cost method is set to 'percent of value ex' the cost will be calculated at the percentage of the value ex and set the Sale Vale Ex Tax Percent to be the percentage. Eg if you wish to see a GP% of 0 on the Sale set the sale value ex tax percent to be 100%
- Product Supplier Cost - at the time you insert either a sales order, service order, sale shipment or service shipment, if the product is in the non-stock product category set up to have a costing method of 'product supplier cost' at the time you click on Save, the system will use the CostP1 on the primary supplier on that product (cost price 1 mapped for any unit difference between the buy and sell units being used).
If you set a non-stock product category to have a costing method of 'primary product suppliers', ensure that all products within this product category have a primary supplier flagged with a costp1 price.
Creating a new Sub Category
- Highlight the Parent Category whether it be Non Stock or Stocked
- Click on button "New"
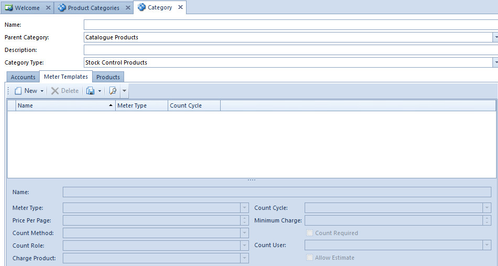
The Category entry window appears
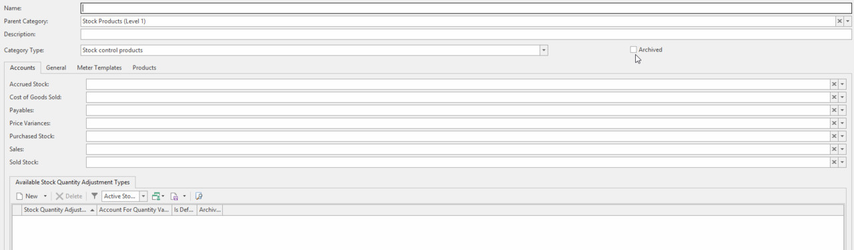
- Enter the name of the Sub Category
- Use the drop down box to select the Parent Category
- Enter the Description of the Sub Category
- Select the Category Type that this category belongs to from the drop down list (Either Stock Control Products or Non-Stock Control Products)
- Either leave the General Ledger Accounts Tab blank and allow the system to use the Parent Product Category General Ledger accounts for that sub category or fill in the General Ledger Account that you may wish to dissect the transactions to in the Appropriate area of the Category.
- In the 'Available Stock Quantity Adjustment Types you can set up the Reasons if you will be using the product for Stock Adjustments otherwise ignore.
If you click on button New
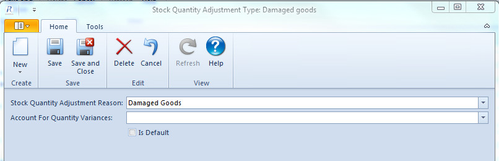
- Select the Stock Quantity Adjustment Reason from the drop down list
- Select the Account For Quantity Variances from the drop down list
- Is Default flag is turned on if you want to use this as a default or left off if you don't want to use it as a default. If the product category is set as Default in the Stock Qty Adjusment area, then that is the GL account that is used when doing a stock take.
Click on tab "Meter Templates" if you wish to use this product within Services and Meter count otherwise ignore.
Click on button New
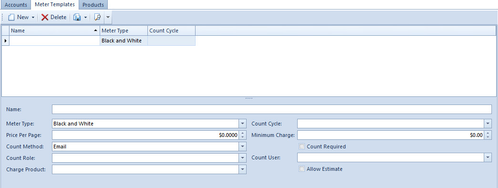
- Key in the Name of the Meter Template
- Select the Meter Type from the drop down box
- Select the Count Cycle from the drop down box
- Key in the Price Per Page (or use the up and down arrows to increase the price/decrease the price)
- Key in the Minimum Charge
- Select from the drop down box the Count Method
- Turn the flag on IF Count Required. Leave the flag OFF if it is not required
- Select the Count Role from the drop down list
- Select the Count User from the drop down list
- Select the Charge Product from the drop down list
- Turn the flag on if you want the system to Allow Estimate. Alternately leave the flag off if you do not want the system to allow estimate
Click on tab "Products"
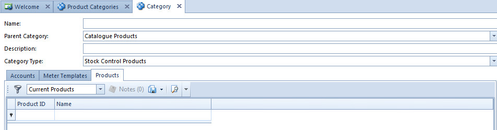
- The products for this category are displayed. (Use the drop down box to see more options)
Once you have finished click on button "Save and Close"
To prevent discounts on categories, locations and products where the price was already discounted. Click General tab then uncheck option “Allow sell Price Discounts”.
See also
Cleaning up product categories
- Available Stock Quantity Adjustment Types
- Getting Started with Product Categories and the General Ledger Rules
- Managing product categories for Office Brands members
- Merging product categories to clean up store categories
- Setting up of a Non Stock Product Category that is a form of a service