Sites
- Sue Michael (Unlicensed)
- Herman Wijoyo
- Monica Chand (Deactivated)
Overview
Readysell supports an unlimited number of sites. Each site can be configured to behave differently with its own staff, warehouse rules, printing rules etc.
Before creating a site, firstly work out if you are Cloud Base or Local Host.
If you are cloud base, you don't have a test database in case you should want to create the site on the test database and have a play around before doing anything in live.
Creating a site takes a while as the process involves the creating of another site for Chart of Accounts, Products etc.
You should also check and see if you need any additional tenders as tenders and review your current tenders table.
Please consult with Readysell before creating sites/or additional sites.
Important
New Site button has been disabled for users. Please contact Readysell if need create a site. License and cost might apply for new site.
- From the Navigation panel, click on "Administration" and then click on "Sites"
The Sites browse window appears
- Click on button New
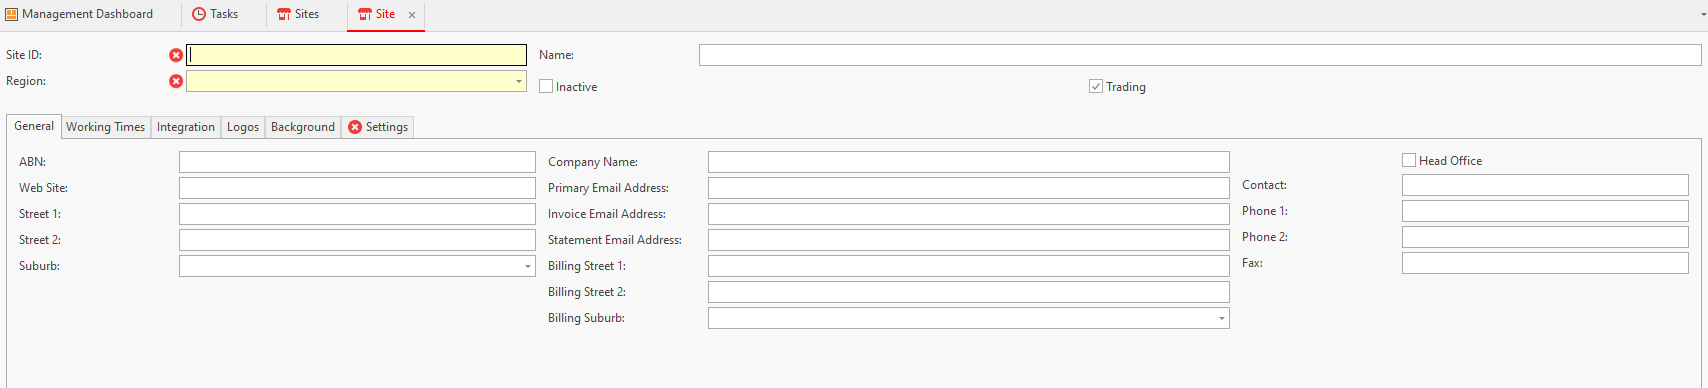
The Site entry window appears
Latitude - Longitude
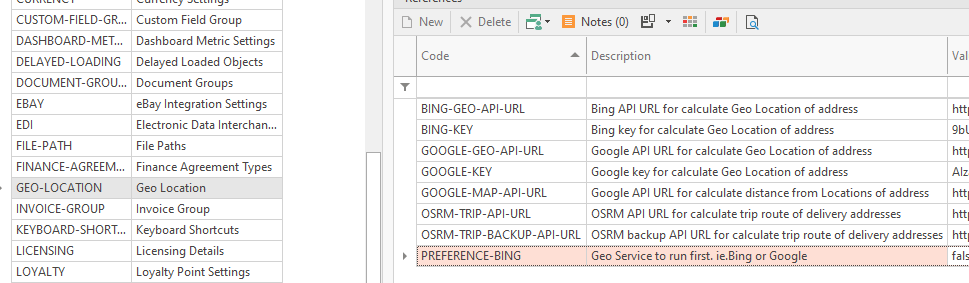
Latitude and Longitude will be calculated by Readysell using GEO-LOCATION provider automatically upon creation OR using task Readysell Tool (contact Readysell support).
Settings can be found in System Type : "GEO-LOCATION".
- Key in the Site ID (this is the site code for this site - keep it as short as possible)
- Key in the Name of the site ID
- Use the drop down box to select the Region
- The Inactive flag is for future use if you want to make the site inactive without having to delete it.
- Trading flag - this flag marks whether or not the site is trading (flag on) or has ceased trading (flag off).
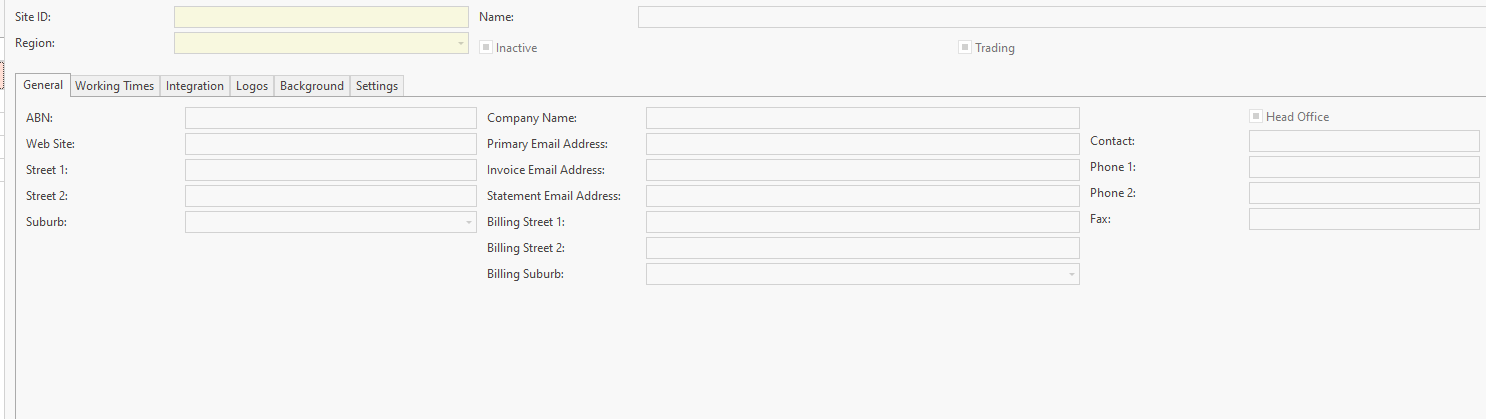
- Tab General
- Key in the site's ABN
- Key in the Website for the site
- Key in the Company Name for the site
- Key in the Primary Email Address for the site
- Key in the Invoice Email Address for the site, this is used for all invoice layouts. If left blank it will use the Primary Email Address
- Key in the Statement Email Address for the site, this is used for all statement layouts. If left blank it will use the Primary Email Address
- Tick the tick box if this site is the main Head Office out of all the site/s
Key in the Address of the Site into the fields above

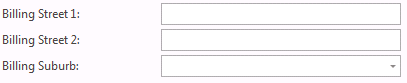
Key in the Billing Street address details
Key in the Site's Contact Details into the above fields.
- Tab Working Times - leave this for now. If you want to enter your working times for the company you can put your start and end times in using the New button
- Tab Integration - this is for IFS and where you may have a head office of your own that you need integration with. If you do - you MUST contact Readysell about this.
Tab Logos
Double click into the No Image Data field, it opens up your windows explorer so that you can search your system and add in an image for the site. You can add up to 2 images for each site you create. (this would need to already be created and saved to a certain section of your hard drive/server in order to select it from there)
You can also set a default Background Image for that Site for their screens by double clicking on the No Image Data field and selecting from the windows explorer the background you wish to use (this would need to already be created and saved to a certain section of your hard drive/server in order to select it from there)
- Tab Background - this is for an image you would like shown in the background of all of your Readysells. Not advised as this can slow down the loading of your screens. Please speak with Readysell before you use this.
Tab Settings

- Currency - this is the currency you want to trade in for this site. If this site is a standard Australian trading site, set it as AUD Australian Dollar
- Default Location - you MUST set a default location for every site you have. If you do not set the default location, you will wind up with errors when trying to trade. This is the default fall back location for a product if you have not yet assigned a location to your products.
- Bank Account - Set the GL Bank Account from the drop down list as found in your General Ledger (GL)
- Sort Index - this is the order in which you see your list of sites in the list view for the Sites module
- Opening Date - what date does this site become active? (today? tomorrow? Next week? etc)
- Closing Date - what date does this site close off? Leave it empty - fill it in only when you decide to no longer use this site
- Physical Area - you do not have to fill this one in. But you can if you want to. It's in Meters squared
- Auto Stock Adj (POS) - should auto stock adjustments be allowed? And if so this setting is for the POS software
- Stocktake Mode - greyed out - no needed to be filled in at this point in time.
- Clear Stock Mode - defaults to Final Stocktake. Leave as is, if unsure, call Readysell.
Automated Warehousing section
If you had autowarehousing turned on for your other site that already exists and expect this site to operate the same with picking slips automatically generating and possibly printing, then you MUST get in touch with Readysell for help with this section.
- Generate Shipments flag - Turn this on if you want this site to automatically generate picking slips for any sales for this site
- Always Release Priority flag - Turn this on if you want this site to automatically generate picking slips for any sales for this site
- Mins of Priority for Cut Off - set the minutes for the cut off time for priority
- Min Age - at what age do you want Readysell to generate picking slips. This must be filled in
- Min Alloc % - is there a minimum allocation percentage that you want to picking slips to have before a picking slip is generated? This must be filled in
- Max Shipments Outstanding - you can tell the system how many outstanding sale shipments you can have before it stops picking slips from generating. Once you start completing the sale shipments, the automated warehousing will then automatically start generating sale shipments again
- Critera section
MUST be filled in by a Readysell staff member
- Tab General
Click on button Save and Close
Product site and Account site will be generated by Task (Refresh Readysell Data) runs by schedule. If need these data created at this time, please run task manually.
See also:
Automatic warehousing training guide