/
Conducting a stocktake using batch scanners
Conducting a stocktake using batch scanners
In the navigation panel, go to Inventory then Stocktakes.
- Click New. (If you have already created a new stocktake, you can skip this step.)
- Enter a description for the batch scan.
- To confirm your batch scanning is configured please click here
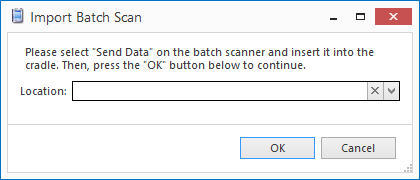
Click Import Batch Scan. The Import Batch Scan window displays.
- Select a location from the drop down list.
- On the scanner, select Send Data then insert the scanner into the cradle.
- In Readysell, click OK.
Readysell will import the information from the batch scanner and display it in the Lines section of the stocktake window. - Check that the quantities are correct
- When you have finished, choose one of the steps below to complete. You cannot complete the stocktake until all stocktake records have been finalised.
- Save: to save the stocktake record, you able to go back to working on it.
- Finalise: Stocktake is completed and closed you cannot work on it.
If product is not found when barcode is scanned
- Line will appear in the stocktake but with no product- in line notes barcode will be listed
- Click on the product field, search for the product the barcode matches to
- Select the line notes tab and copy the barcode
- Select the product from the lines, click on product details
- Product information screen will appear, click on General tab> alternate IDs tab> New and paste the copied barcode
- Save the information
, multiple selections available,
