Entering and processing a manual purchase order
- Sharon Harden (Unlicensed)
- Carolynne Robertson-Dunn (Deactivated)
- Sue Michael (Unlicensed)
Only active and obsolete products can be entered in a purchase order.
- In the Navigation panel, click on Purchasing, then click on Orders
Click on button New. (the purchase order screen displays)
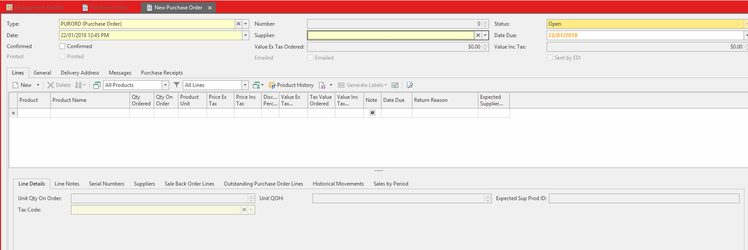
- Select the supplier from the drop-down list. You can only have one supplier per purchase order.
- In the Lines tab, enter products as follows:
- Click on button New
- In the Product column, search for and select the product you wish to add.
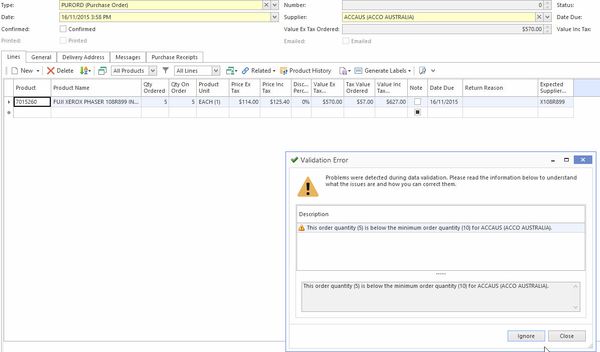
Enter the Qty Ordered required.
If Qty Ordered is below the minimum order quantity stipulates by the product supplier (this field is stored in Relationships>Cards>Settings>Supplier Settings>Min Order Qty) then a warning message will display.
- Repeat this process for all the products you wish to add to the order.
- Once you have finished...
- Click on button Save and use the Show in Report button to print or email the purchase order to the supplier. See below for Printing and emailing purchase orders for more information.
OR - Click on button Send which has 3 options
- Email (Background) - this means the purchase order will automatically save and then send straight off to the supplier's default email address without you having to type anything in
- Email (Prompt) - this means the purchase order will automatically save and then a prompt window will open showing the supplier's default email address (without you having to type anything into this field), your email address, the subject line. You can key in the body to the email, check what it will look like before you send it (Preview tab) and see what attachments are on this email (usually only the purchase order by default). Click on button Send to actually send the email when you are ready.
- Print - prints off the purchase order to whatever printer is defaulted in your workstation settings.
- Click on button Save and use the Show in Report button to print or email the purchase order to the supplier. See below for Printing and emailing purchase orders for more information.
- You can repeat the creation process for any further purchase orders you need to create.
Once you receive stock from the supplier, you will need to receive it into Readysell. See Purchase Receipts for more information on this process.
Completing a purchase order
Once you have entered a purchase order, you can use one of the following options to save and complete it.
- Save and Close will save the order and close the module. Note down the purchase order number in case you want to go back into it.
- Complete will update the purchase order and take you to the Complete Purchase Invoice window.
- Enter the supplier invoice number and enter the correct invoice date as per the supplier invoice.
- Click on button OK.
- Receive will update the purchase order and take you to a New Purchase Receipt window
- Check the products (using the delivery docket and/or supplier's invoice) and the value of each product (if you have the supplier's invoice in front of you) on the purchase receipt, and make any adjustments required.
- Now choose one of the steps below to complete the receipt and invoice:
- Save: Saves the purchase receipt, and leaves the window open for further editing.
- Save and Close: Saves the purchase receipt and closes the window. The receipt is not posted.
- Finalise: Saves and posts the purchase receipt, and updates stock on hand.
- Complete: Saves and posts the purchase receipt, updates stock on hand, and writes the supplier open item.
Creating a purchase order for a single location
- In the Navigation panel, click on Purchasing, then click on Orders
Click on button New. (the purchase order screen displays)
- Enter the supplier from whom you are purchasing goods.
- Site is the location where you will be receiving the goods. There will be a different topic about creating a purchase order for multiple locations.
- Enter products. If you have entered a supplier, you can restrict the view to contain only products they supply.
- Date Due is the date of the purchase order plus the lead time on the supplier card. Lead time is probably in working days.
- Click on Save
- Notes can be added at this point. If you want a note to appear on the invoice, tick External. (the purchase order must be saved first before you can add a header/delivery note to it)
- Once you have finished, click Save.
- Then click Send to send the purchase order. There are different ways of doing this: Background (will send in the background), Prompt (will send immediately), or "just print" according to my notes.
- You can also print a purchase order by going to Show in Report.
- The next step is either receiving the goods or receiving the invoice.
Printing and emailing purchase orders
Once you have created a purchase order, click Show in Report and select Purchase Order / Supplier Credit Request. Readysell displays the purchase order on the screen in a printable format.
From here, you can do the following:
- Click on Print or Quick Print to print the purchase order.
- Click on Send via E-mail to send the purchase order to the supplier as an attachment via email. If you have entered an email address for the supplier, this will automatically be filled in. You can edit the email message before sending it.
- Click on Send E-mail and Close to send the email as above. Readysell will close the purchase order window once the email is sent.
- Click on Export To to export the purchase order to a file.
- Click on E-mail As to send the purchase order in a particular format.
You can also use the other buttons in the ribbon to navigate through the purchase order and to change some aspects of its appearance.