Creating a new supplier
- Diane Partridge
- Carolynne Robertson-Dunn (Deactivated)
- Monica Chand (Deactivated)
Procedure
- In the navigation panel, double-click Relationships, then click Cards.
Click New to create a new card. The Card Details screen will display.
If you are creating a supplier that is similar to an existing card, you can use the Copy option to copy some of the existing card's details.
- In the top section of the Card Details screen, enter background details for the card:
Card ID
If you are part of the Office Brands group then ensure that you use the Supplier Card Ids from the Data Portal.
You can download a spreadsheet to identify the supplier card ids from either the Data Portal or your price book.- Card Type- this is optional
- Status- there is no need to changed the field
- Enter customers Name.
- Tick Is Supplier to mark this card as a supplier.
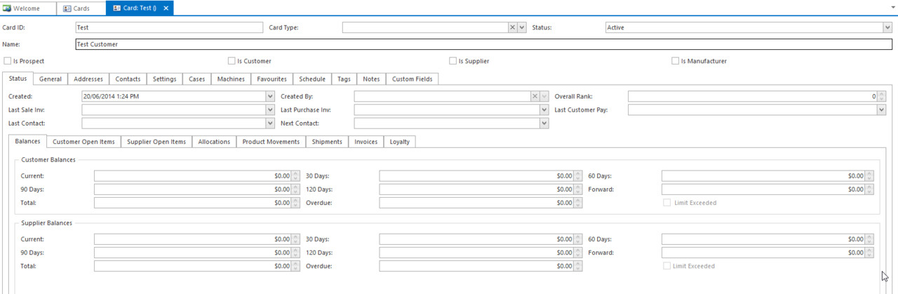
- Click on the Status tab.
- Fill in the following fields as necessary:
- On Stop: if On Stop is flagged, any purchase orders placed for this supplier will automatically be put on hold; it then requires a user with appropriate permission to release the order.
- Account Closed: if this is flagged, the supplier will not be visible when placing purchase orders, supplier misc debits, misc credits or payments. You should not have to do this for new suppliers.
- Enter Last Sale Invoice- Optional
Enter Last Purchase Invoice Date- Optional
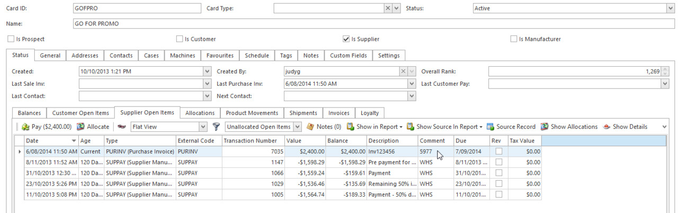
- Use Column Chooser to add column name Comment to the Status tab display layout
- Comment can be configured via system reference PURCHASE-INVOICE-OPEN-ITEM-COMMENT of the Purchasing system type to display one of the following
- Site
- Purchase Order Transaction Number
- Purchase Receipt Transaction Number
- Assign the system reference to the required property e.g. PurchaseOrderTransactionNumber.
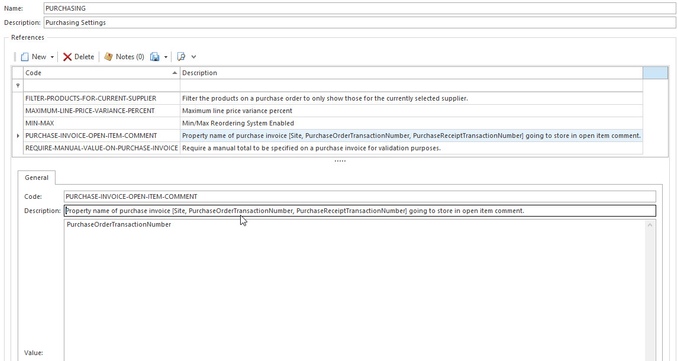
- Use Column Chooser to add Comment column to the Status tab.
- Comment column will display the value of the system reference property assigned above e.g. 5977 is the purchase order transaction number
- Note that the displayed value is persistent i.e. the value is bound to the property assigned at the time
- Click on the General tab.
- Fill in the following fields as necessary:
- Enter Trading As- Optional
- Enter ABN for the company- Optional
- Select Parent
- Click on the Bank Accounts tab, should you have the supplier's bank account details.
- Enter bank account details as follows:
- Click New to create a new account.
- Enter the payee name, BSB and account number.
If this is the supplier's primary account, check Supplier Primary Account.
Repeat this process for as many bank accounts as you wish to add. See Card bank accounts for more information on adding bank accounts.
- Click on the Addresses tab.
- Enter address details for the supplier as follows:
- Click New to create a new address.
- In the Name field, enter the supplier's name.
- In the Street 1-4 and Suburb fields, enter the supplier's address details.
- Check the purpose of this address: Accounts, Delivery, Physical or Postal. An address can have more than one type.
- Repeat this process for as many addresses as you wish to add.
- Click on the Contacts tab.
- Enter contact details for the supplier as follows:
- Click New to create a new contact.
- Enter Name of person
- Enter Job Description for the person
- Enter their Web ID- optional
- Enter the Phone, Mobile, Fax and Email Address optional fields.
- Enter persons Role.
Select one of the checkboxes, specify the roles that the contact plays within Readysell.
Repeat this process for as many contact people as you wish to add. You must have at least one contact person.
- Click on the Settings tab, then the General Settings sub-tab.
- Fill in the fields as follows:
- Select Card Status- Optional
- Discount from List field does not apply to suppliers.
- Optionally, assign a Tax Code to the card.
- Available on POS does not apply to suppliers.
- Still on the Settings tab, click on the Supplier Settings sub-tab.
- Fill in the following fields:
- Select the Tender- Optional
- Select a Payment Term
- Check Back Order Allowed to allow back orders with this supplier.
- Supplier Acc Number field.
- Enter any other appropriate details. See Card settings to learn more about the fields on this tab.
Click Save to save this card in Readysell.
Card references covers details about optional tabs on this detail view including cases, machines, favourites, schedule, tags, notes and customer fields