Generating Purchase Orders using a Purchase Run
In the navigation panel, click to Purchasing then Purchase Runs.
Click on the button NEW to create a new purchase run.
Click on button Extract Products button from the top panel
Extract Products window appears

- Either select a previously set 'Purchase Run Set' OR create your own by clicking on the 'Name' field and click on the button 'NEW'
Key in the Name of the Purchase Run Set (Name of query to use for this purchase order run)
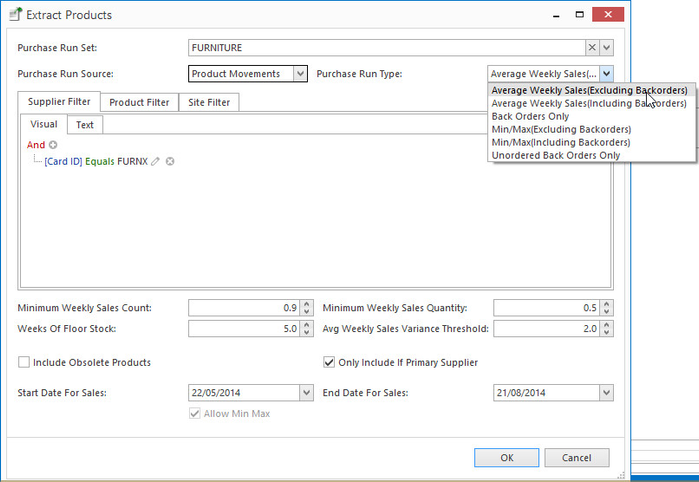
User can configure purchase run via Purchase Run Type to generate the bulk of their purchase run details early in the day electing to exclude back orders. This allows the user the time to edit the results.
Later in the day, just before the purchase order deadline, User can extract back orders only onto the purchase run just before they generate purchase orders.
- Use the And+ button in Supplier Filter and even using the Product Filter And+ button to create a filter/query for this purchase order run.
- Select the field that is appropriate to the query/filter you are creating (i.e. Begins with, Equals, Contains, etc.) This example uses 'Equals'
- Then key in the data that matches this query. This example uses - 'Card ID' Equals with 'Acco'
- 'Minimum weekly sales count' = each week the product within this run has to have at least this number of sale lines for that week (.9 is less than 1 sale)
- 'Weeks of floor stock' = number of weeks worth of stock that you wish to keep
- 'Minimum weekly sales quantity' = minimum quantity that must be sold each week before the product can be ordered (0.5 at least sell a quantity of half)
'AVG weekly sales variance threshold' = if in any week the quantity sold varies from the average by this amount then that weeks sales will be ignored. This acts to stop once off large sales from distorting the overall average quantity sold for a product.
Now enter the Start Date For Sales and End Dates For Sales
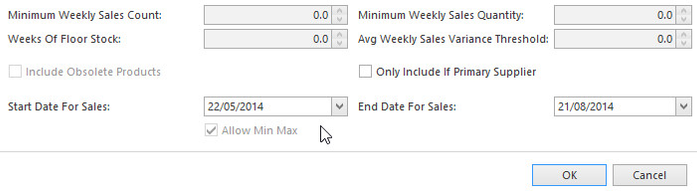
- Click on OK to accept the run
Click on Save and Close
- The purchase order work file now generates and shows to screen a list of purchase orders according to the information you selected in the query/filter.
You can now go and edit the purchase order work file.

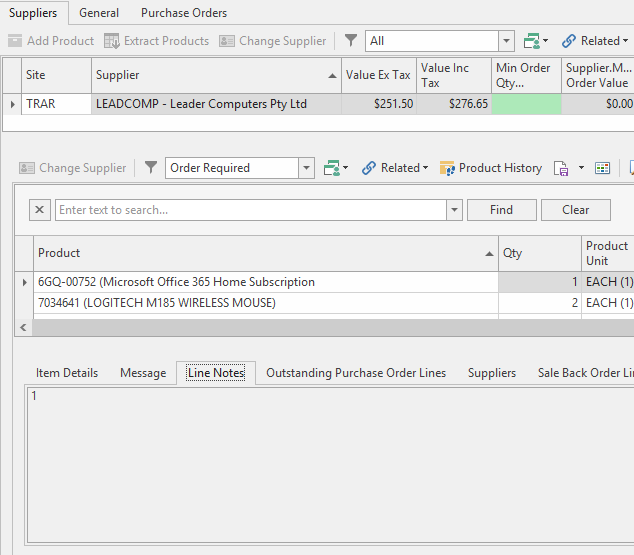
- The products appear in the field directly below. Here you can adjust the quantity on order, resort the lines, you can also delete the lines.
- The Product Details button shows you all details on that product on the purchase order.
Hit the X button to retrurn to the purchase run
%20LANTERN%20Kareem%20Assorted%20Colour_2011-08-01_17-21-08.png?version=1&modificationDate=1312183291000&cacheVersion=1&api=v2&width=300&height=139 "Product 14122 (LANTERN Kareem Assorted Colours) LANTERN Kareem Assorted Colour_2011-08-01_17-21-08.png")
The Item Details tab shows what stock is required, stock allocated, stock on outstanding,the purchase orders, stock on hand, net quantity of stock on hand, quantity on sales back orders and stock that is available.

The Line Notes tab allows you to enter line notes on the purchase run.
- Select from the drop down list Order Not Required.
- This shows you a list of products that are not required to be ordered. Select one of the products by left clicking on it to highlight it blue and click on the tab at the bottom Exception Message
The Exception Message tab shows the reason why the product was not ordered. This example shows "Excluded because: - Quantity net quantity on hand (0) is greater than or equal to the minimum quantity required (0).

To move a product from the Order Not Required to Order Required list, change the product's QTY from 0 to the required value.

- If you haven't finished browsing through the work file and want to come back to it later, click on button Save and Close .
If you have made changes to the workfile click on Save
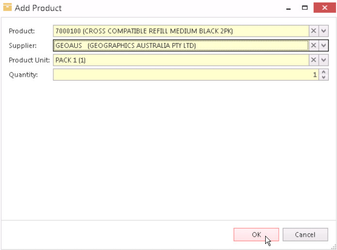
Click on the Add Product button to add other products that are not already on the Order Required list
If you are ready to generate the work file into Purchase Orders Click on Generate Orders.

If you are sure you want to continued the process of building the work file into actual purchase orders click on Yes. If you are not finished working in the purchase order work file click on No and make sure you use the Save button to go back later to continue working on the work file.


- The list of purchase orders now shows in the window (as show above).
Use the button Generate Email Batch to email the suppliers these Purchase Orders. When you have finished click on the button Save and Close.
If there are any EDI suppliers, a popup shows before the batch is created "There are supplies that support EDI in this purchase run. Do you want to submit the order via EDI for these suppliers instead?"
If you click No, continue as normal. If you click Yes, remove those suppliers from the batch and instead open a detail of each purchase order in a new tab so that you can Send via EDI.
This closes off the purchase run you've just completed and takes you back to the Purchase Runs window ready for you to create your next new Run.
