Creating an contract for a customer and an individual product
- In the navigation panel, go to Relationships then Contracts.
- Click on button New
- Enter the Name of the contract
- Enter the long Description of the contract
- Leave the Workflow Status as InActive (if you change this you cannot make any further changes at this point to the contract)
- Select the Start and End Date for this contract
- On the products tab, turn off the flag for All Products
- On sub tab Individual Products, click on New
- In the bottom section of the screen key in the Product code for this contract
- Select the Contract Price Type
- Enter the Value
- Continue the process to add any further individual products to this contract
- On the Cards tab, turn off the flag for All Customers
- Click on New
- Key in the Card id
- If the Start Date and End Date are different to the main contract start and end dates, then fill these in. If they are not different to the main contract start and end dates, leave these date fields blank.
- Click on Save and Close
- Continue the process to add any further cards to this contract
- Click on Workflow Status drop down and select Active
- Click on button Save and Close.
This contract is now up and running.
Creating a contract for Freight
- In the navigation panel, go to Relationships then Contracts.
- Click on button New
- Enter the Name of the contract (e.g: Freight Charge)
- Enter the long Description of the contract (E.g: "Freight Charge For Orders Less Than $75")
- Leave the Workflow Status as InActive (if you change this you cannot make any further changes at this point to the contract)
- Select the Start and End Date for this contract
- On the products tab, turn off the flag for All Products
- On sub tab Individual Products, click on New
- Key in the Product code for this contract (E.g: FROUT)
- You need to find the product that is set-up as freight OR create the product that stands for the freight charge, if it does not already exist.
- Click here to see creating products
- Ensure on the product the price is set as what you require. Set the sell price of this non-stock product to the right sell price or set the contract below to calculate the sell price.
- You need to find the product that is set-up as freight OR create the product that stands for the freight charge, if it does not already exist.
- Select the Contract Price Type in this case Quantity minimum.
- Min Qty needs to be set as 1.
- On the Cards tab select cards or check on "All Customers".
- Click on Save and Close
- Click on Workflow Status drop down and select Active
Click on button Save and Close.
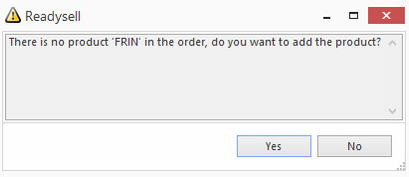
When a sales order is entered and you try to ship the order a pop up window appears as per below image.
- If you click YES it adds the freight product that is fine
- if you say NO the product is not added and the shipment is created.
This contract is now up and running.
If Auto Warehousing is on at the site, then when auto warehousing generates a shipment, the Freight product will be added to the shipment.